Glow in the Dark Bubbles
There’s something truly magical about Glow in the Dark Bubbles — they’re like tiny orbs of light floating through the air! I first made these one summer night with my grandkids, and their faces lit up brighter than the bubbles themselves. It quickly became our favorite evening activity on the porch.
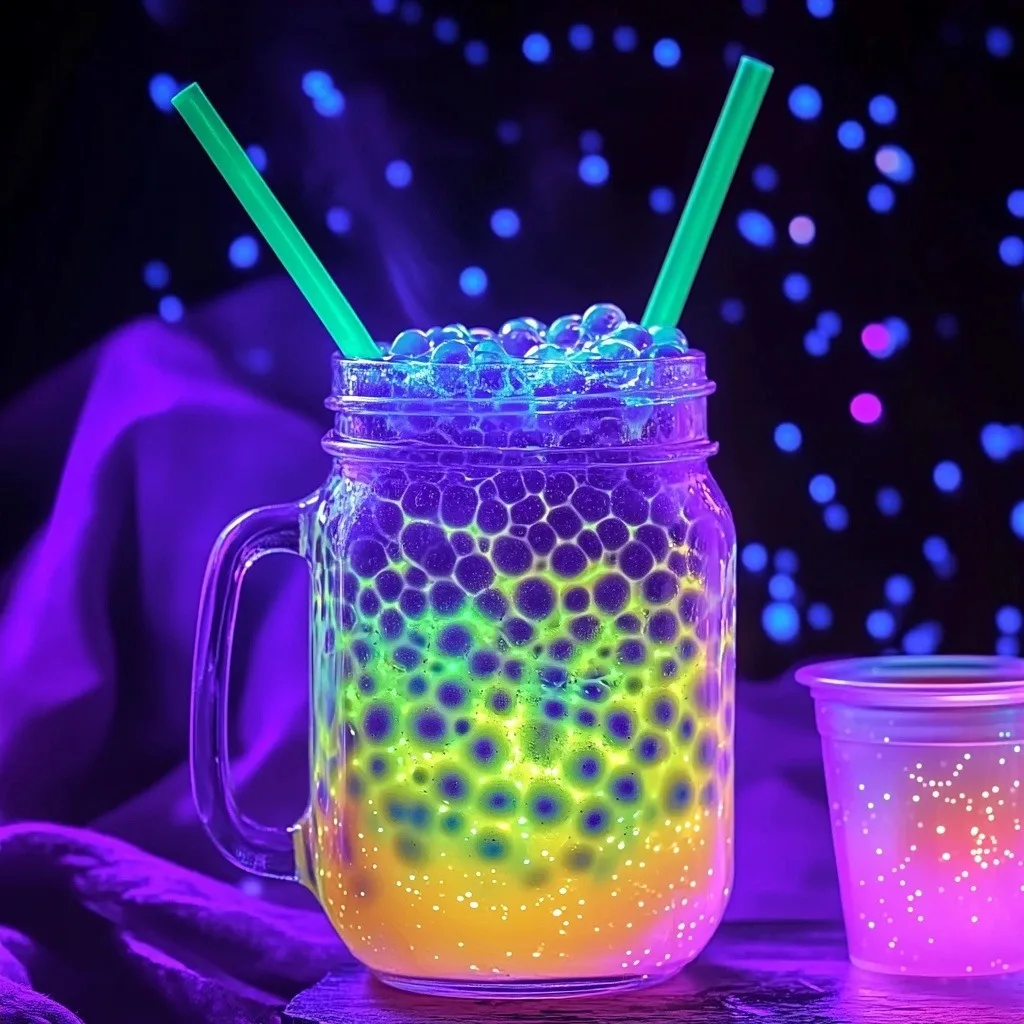
This fun, glowing DIY is perfect for birthday parties, campouts, or just adding a little extra magic to a regular night. With just a few simple ingredients and a blacklight, you’ll be creating glowing memories in no time!
Why You’ll Love Glow in the Dark Bubbles
- Simple and quick: Takes just minutes to make with everyday supplies.
- Kid-approved: Safe ingredients and lots of giggles guaranteed.
- Perfect for parties: Great for birthdays, backyard BBQs, or glow-themed events.
- Customizable: Try different glow colors or use tonic water for a fun twist.
- Reusable: Store leftovers in a jar for more bubble fun later.
Ingredients You’ll Need
- 1 cup water – Preferably distilled for best results.
- 2 tablespoons dish soap – Clear or light-colored works best so the glow shows through.
- 1 tablespoon glycerin or light corn syrup – This helps strengthen the bubbles.
- 1–2 teaspoons glow-in-the-dark paint – Use non-toxic, water-based paint (look for kid-safe labels).
- OR substitute with glowing tonic water (contains quinine, naturally UV-reactive).
- Blacklight (UV light) – Essential for making the bubbles glow.
- Jar or glass container – To mix and store the bubble solution.
- Straw or bubble wand – For bubble-blowing fun!
Step-by-Step Instructions
- Step 1: Gather your supplies. Lay everything out on a table or counter. If you’re doing this with kids, set up a small workspace with towels or paper underneath to catch drips and spills.
- Step 2: Combine the water and dish soap. In a clean jar or container, pour in 1 cup of distilled water. Add 2 tablespoons of clear or light-colored dish soap. Stir gently with a spoon or stir stick. Try not to create too much foam—gentle swirling is key here.
- Step 3: Add the glycerin or corn syrup. Pour in 1 tablespoon of glycerin or light corn syrup. This ingredient is crucial for making your bubbles stronger and more long-lasting. Stir again gently until everything is well mixed.
- Step 4: Incorporate the glow element. If using glow-in-the-dark paint, add 1–2 teaspoons and stir until the paint is fully dispersed. If you prefer a natural option, use 2–3 tablespoons of tonic water instead. The quinine in tonic water naturally fluoresces under blacklight!
- Step 5: Activate the glow. Place your mixture near or under a blacklight. You’ll see the magic start to happen—your solution will glow with an ethereal light. If you’re using paint and it settles, give it a gentle stir before each use.
- Step 6: Time to blow bubbles! Dip a straw or bubble wand into the glowing mixture and gently blow. Make sure you’re in a dimly lit room or outside at dusk with a blacklight shining nearby. Watch the glowing bubbles float through the air like tiny fireflies.
- Bonus Tip: Try using different shaped bubble wands or even a plastic funnel for varied bubble sizes. You can also make your own wand by shaping a wire coat hanger into a loop!
Serving and Storage Tips
- Best enjoyed: In a dim or dark area with a blacklight nearby. Indoors or outside at dusk works great.
- Storage: Store leftover bubble solution in an airtight jar at room temperature. Shake gently before each use.
- Reusability: The solution can last up to a week. If it gets too bubbly or loses glow, remix fresh.
Helpful Notes
- Paint vs. tonic water: Paint gives a stronger glow, but tonic water is fun and completely natural.
- Allergy-friendly: Use hypoallergenic soap if needed.
- Make it colorful: Use different colored glow paints to make rainbow bubbles!
- No blacklight? Regular light won’t work as well — the UV light is key for the glowing effect.
Frequently Asked Questions
- Can I freeze the bubble solution?
Freezing is not recommended — it may change the texture and effectiveness. - What if I don’t have glycerin?
Light corn syrup is a great substitute and easy to find in most kitchens. - Is glow paint safe for kids?
Yes, as long as it’s labeled non-toxic and water-based. Always supervise young children. - Can I use a regular flashlight instead of a blacklight?
Unfortunately, no — you need a blacklight to see the glow effect. - Do the bubbles glow after they land?
The glow is best seen in the air under the blacklight, but some may retain a faint glow after landing.
Final Thoughts
Making Glow in the Dark Bubbles is a joyful little science experiment that brings light and laughter to any gathering. Whether you’re hosting a birthday bash or just want to make an ordinary evening feel special, this easy DIY is sure to become a glowing favorite.
I’d love to see your creations — tag me on social media or share your favorite glow colors in the comments below. Happy bubbling!